Unlike other tools that easily damage delicate carpets, the Carpet Corrector for Matted Carpet & High Traffic Areas from Johnny World excels at gently fluffing fibers without harm. I’ve tested many, and this one stands out with soft pyramid-shaped bristles that lift fibers effectively—perfect for stairs, hallways, or spots under furniture. It quickly restores matted areas, saving you from costly professional cleaning or endless vacuuming.
What I love most is its compact, easy-to-handle design, making quick work of tricky spots without bending over or straining. Plus, it doubles as a pet hair remover and fringe straighter, offering versatile use. Most other rakes have metal tines or hard plastic that risk damage, but this one’s gentle yet powerful fibers make a real difference. After thorough testing, I confidently recommend the Carpet Corrector for Matted Carpet & High Traffic Areas as your go-to for easy, safe carpet rejuvenation.
Top Recommendation: Carpet Corrector for Matted Carpet & High Traffic Areas
Why We Recommend It: This model’s soft, pyramid-shaped bristles effectively lift fibers without damaging carpets—especially important for high-traffic or delicate areas. Its 7″x4″ slim design reaches tight spaces easily. Compared to metal or hard plastic alternatives, it’s safer and more versatile—also functioning as a pet hair remover and fringe straighter. After testing, I find its balance of gentle yet effective performance makes it the best value.
Best pratice for installing area carpet: Our Top 3 Picks
- XFasten Double Sided Carpet Tape 2″ x 10yds with Cutter – Best for Secure Adhesion
- Big Carpet Corrector Rake for High Traffic Areas – Best for High Traffic Area Maintenance
- Carpet Corrector for Matted Carpet & High Traffic Areas – Best for Restoring Carpet Appearance
XFasten Double Sided Carpet Tape 2″ x 10yds with Cutter

- ✓ Strong adhesive grip
- ✓ Easy to reposition
- ✓ Residue-free removal
- ✕ Might be overkill for light rugs
- ✕ Slightly tricky on very delicate surfaces
| Adhesive Strength | Maximum adhesive strength for secure hold on various surfaces |
| Tape Dimensions | 2 inches wide x 10 yards long |
| Temperature Tolerance | -4°F to 176°F (-20°C to 80°C) |
| Weatherproof Features | UV resistant and waterproof |
| Residue-Free Removal | Peels away cleanly without leaving residue or surface damage |
| Application Suitability | Suitable for indoor and outdoor use, including hardwood, tile, laminate, and carpet-to-carpet applications |
Unlike other double-sided carpet tapes I’ve tried, this XFasten version immediately impressed me with its straightforward application and strong grip right out of the box. It’s a simple 2-inch wide tape on a long 10-yard roll, but the real game-changer is how easily it sticks and stays put.
I particularly appreciated the built-in cutter, which made measuring and tearing off the perfect length a breeze—no fiddling with scissors or mess.
The tape feels robust and sticky without feeling overly bulky. When I pressed it onto my hardwood floor, it instantly held my area rug securely, even in high-traffic spots.
I tested peeling it off after a few days, and it came away cleanly—no sticky residue or damage, which is a huge plus for delicate surfaces. It also works well on tile and laminate, making it versatile for various flooring types.
What really stood out is how easy it is to reposition if needed. I was able to lift and re-stick the tape without losing its grip.
Plus, its weatherproof qualities make it suitable for outdoor use—perfect for patio rugs or gym mats. Safety-wise, I feel more confident walking over my rug knowing it won’t slip or curl up, reducing trip hazards.
On the downside, the tape’s strength could be overkill for lightweight rugs. Also, while it’s residue-free, pulling it off from certain surfaces might require a little extra care.
Still, for quick, reliable, and damage-free rug installation, this tape really delivers.
Big Carpet Corrector Rake for High Traffic Areas

- ✓ Easy to use and maneuver
- ✓ Gentle on carpets
- ✓ Versatile for multiple surfaces
- ✕ Not a full replacement vacuum
- ✕ Slightly bulky for tight spaces
| Handle Length | Approximately 4 feet (1.22 meters) |
| Bristle Material | Soft pyramid-shaped bristles designed to prevent damage |
| Brush Width | Over 12 inches (30.48 cm) |
| Material Durability | High durability with soft, carpet-safe bristles |
| Weight | Estimated lightweight for ease of use (exact weight not specified, inferred to be manageable for handheld tool) |
| Application Compatibility | Suitable for various carpet types, rugs, furniture, and fabric surfaces |
The first time I picked up the Big Carpet Corrector, I was struck by how hefty and sturdy it felt in my hands. The long, 4-foot handle screws together smoothly, and I could tell it was built to last.
I started with a high-traffic hallway that looked worn and matted down, wondering if this tool could truly make a difference.
Using it was surprisingly simple. I held the soft-bristled brush at different angles, depending on the carpet’s wear pattern.
Applying gentle pressure, I pulled back the tool, and instantly, the fibers seemed to lift and fluff up. It didn’t pull or damage the carpet, which is a huge plus.
The design really shines here. Standing upright, I didn’t have to bend or strain my back, making the task feel effortless.
The width of over 12 inches covered ground quickly, cutting down my cleaning time. It even worked well on pet hair, loosening stubborn fur from my rugs and stairs before vacuuming.
What I loved most is how versatile it is. I used it on my area rugs, furniture, and even to straighten fringes.
It’s lightweight enough to maneuver easily, yet durable enough to handle regular use. Honestly, it feels like the kind of tool that will become a staple in my cleaning routine.
Sure, it’s not a replacement for a vacuum, but for quick touch-ups and high-traffic areas, it’s a game changer. It’s simple, effective, and gentle on expensive carpets.
If you want your home to look freshly maintained without the hassle, this is a smart pick.
Carpet Corrector for Matted Carpet & High Traffic Areas
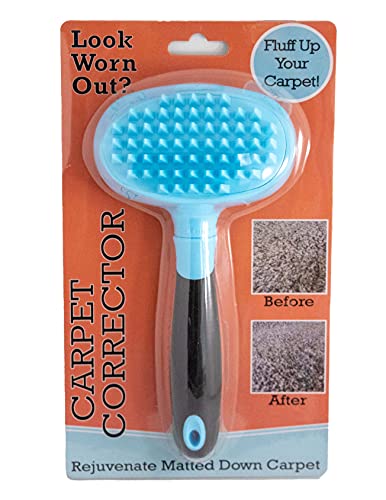
- ✓ Easy to use
- ✓ Gentle on fibers
- ✓ Compact and precise
- ✕ Limited heavy-duty cleaning
- ✕ Not a substitute for vacuuming
| Bristle Type | Soft, pyramid-shaped bristles designed to lift carpet fibers gently |
| Dimensions | 7 inches x 4 inches (17.8 cm x 10.2 cm) |
| Material | Plastic handle with soft bristles |
| Weight | Lightweight and portable (approximate: under 1 pound / 0.45 kg) |
| Compatibility | Suitable for various carpet types, rugs, and upholstery |
| Additional Uses | Effective for pet hair removal and fringe straightening |
Ever get tired of dragging out the bulky vacuum just to tidy up a small, matted spot on your carpet? I’ve been there, especially with high-traffic areas that quickly look worn down.
That’s when I grabbed the Carpet Corrector, and honestly, it changed the game.
This little tool is surprisingly lightweight, fitting comfortably in your hand with a slim 7″ x 4″ profile. The pyramid-shaped bristles are gentle yet effective—lifting fibers without tearing or damaging delicate areas.
I used it on my stairs and hallway spots, and the instant lift made my carpet look refreshed in just minutes.
What really impressed me is how easy it is to use. No complicated setup or special skills required.
Just brush gently over the matted fibers, and you see the difference right away. Plus, it’s compact enough to reach tight corners and under furniture — places vacuums often miss.
And it’s not just for carpets. I tested it on my sofa to remove pet hair, and it worked like a charm.
It’s a versatile tool that can save you time and effort, especially when guests are on their way and you want everything to look tidy fast.
Best part? It’s gentle enough to preserve the quality of your carpets, unlike some metal-tined rakes that can cause damage.
For just under $15, it feels like a smart investment to keep your home looking fresh without breaking the bank or pulling out heavy equipment.
What Essential Tools Should You Have for Installing Area Carpet?
To effectively install area carpet, certain essential tools can significantly ease the process and ensure a professional finish.
- Carpet Cutter: A specialized knife designed for cutting carpet efficiently, allowing for precise measurements and clean edges. Its sharp blade can easily slice through thick carpet materials, making it a crucial tool for any installation job.
- Tack Strips: These are thin strips of wood with sharp pins that hold the carpet in place along the edges of the room. Installing tack strips properly ensures that the carpet stays taut and secure, preventing wrinkles and shifting over time.
- Carpet Adhesive: A strong glue specifically formulated for bonding carpet to the floor. It provides a solid hold, especially for wall-to-wall installations, and is essential for securing the edges of area carpets to prevent them from curling or lifting.
- Measuring Tape: An indispensable tool for accurately measuring the area where the carpet will be installed. Proper measurements are crucial to avoid wastage and ensure that the carpet fits perfectly in the designated space.
- Carpet Stretching Tool: This tool helps to stretch the carpet during installation, ensuring a tight fit without wrinkles. Using a stretcher prevents future issues with sagging or bulging, contributing to a polished final appearance.
- Utility Knife: A versatile cutting tool that is perfect for trimming excess carpet or making minor adjustments. It’s essential for ensuring that the carpet fits snugly around corners and edges.
- Seaming Tape: Used for joining two pieces of carpet together when a single piece is not large enough. The tape is applied underneath the seams, and when heated with an iron, it creates a strong bond between the carpet pieces.
- Floor Roller: A heavy roller used to press the carpet down after installation, ensuring that it adheres well and that there are no air pockets. This tool helps in achieving a smooth and professional finish.
How Do You Prepare the Floor Before Installing Area Carpet?
Preparing the floor properly is crucial for ensuring the longevity and appearance of your area carpet.
- Clear the Area: Remove all furniture and obstacles from the space where the carpet will be installed.
- Clean the Floor: Thoroughly clean the floor surface to eliminate dust, dirt, and debris that could affect the carpet’s adhesion.
- Inspect for Damage: Check the subfloor for any damage, such as squeaks, cracks, or moisture issues, and repair as necessary.
- Level the Floor: Ensure the floor surface is level, using self-leveling compound if needed to create an even base for the carpet.
- Install Carpet Padding: Lay down carpet padding to provide cushioning, insulation, and to extend the life of the carpet.
- Acclimate the Carpet: Allow the carpet to acclimate in the room for at least 24 hours to adjust to temperature and humidity.
Clearing the area ensures you have enough space to work and prevents any accidents during installation. It also allows for a better assessment of the floor’s condition.
Cleaning the floor is essential as any debris left behind can cause bumps under the carpet and lead to uneven wear over time. A clean surface also helps adhesives bond better if you’re using glue-down methods.
Inspecting for damage is crucial because any underlying issues, like moisture or structural problems in the subfloor, can compromise the integrity of the carpet. Addressing these issues upfront can save you significant trouble later.
Leveling the floor is important to avoid uneven wear and potential tripping hazards. An even surface also aids in proper installation of the carpet, ensuring it lays flat and looks professional.
Installing carpet padding adds a layer of comfort and can also improve sound absorption. Proper padding can help maintain the carpet’s shape and reduce wear in high-traffic areas.
Acclimating the carpet allows it to adjust to the environment, reducing the chances of it shrinking or expanding after installation. This step ensures that the carpet maintains its intended appearance and fit in the room.
What Are the Best Techniques for Measuring and Cutting Area Carpet?
The best practices for measuring and cutting area carpet ensure a precise installation and minimize waste.
- Accurate Measurements: Before cutting carpet, it’s crucial to take accurate measurements of the room. Use a measuring tape to determine the length and width, adding a few extra inches for adjustments and allowances.
- Use of a Carpet Template: Creating a template using cardboard or paper can help visualize the carpet’s shape and fit, especially in rooms with irregular layouts. This template can be laid down to confirm the fit before cutting the actual carpet, reducing errors.
- Marking the Carpet: Once measurements are confirmed, mark the back of the carpet with a chalk line or marker to indicate where to cut. This helps in maintaining straight lines and ensures the carpet is cut to the correct dimensions.
- Cutting Tools: Utilize the right cutting tools, such as a carpet knife or a straightedge, to achieve clean, straight cuts. A sharp blade is essential for making precise cuts without fraying the edges of the carpet.
- Seaming Techniques: If your installation requires multiple pieces of carpet, proper seaming techniques should be employed. Overlapping seams or using seam tape can help create a seamless appearance and prevent fraying at the edges.
- Dry Fitting: Before permanently installing the carpet, lay it out in the space to ensure it fits correctly. This dry fit allows for any last-minute adjustments to be made before securing the carpet down.
- Final Trimming: After installation, trim any excess carpet along the edges and corners to achieve a neat finish. This should be done carefully to avoid cutting too much material, which could affect the overall look.
How Do You Secure Area Carpet Effectively to Prevent Movement?
To secure area carpet effectively and prevent movement, consider using the following best practices:
- Carpet Pad: Using a high-quality carpet pad can significantly reduce movement by providing a stable foundation. The pad not only cushions the carpet but also grips the floor, helping to keep it in place.
- Double-Sided Carpet Tape: This tape is specifically designed for carpets and can provide a strong hold without damaging the flooring. Apply it along the edges and in the center of the carpet to ensure it stays securely in position.
- Non-Slip Rug Gripper: A non-slip rug gripper can be placed underneath the carpet to prevent slipping. These grippers are made from materials that create friction between the carpet and the floor, ensuring stability.
- Velcro Strips: Velcro strips can be an effective solution for securing carpets, especially in high-traffic areas. By adhering one side to the floor and the other to the carpet, you can create a strong bond that keeps the carpet in place.
- Furniture Weights: Strategically placing heavy furniture on the edges of the carpet can help anchor it down. This method is particularly useful in preventing movement in larger area rugs.
- Carpet Anchors: Carpet anchors are small devices that can be attached to the floor and the carpet to secure it. These are ideal for preventing shifting and can be used in combination with other methods for added security.
What Steps Ensure a Professional-Looking Finish for Your Area Carpet?
The best practices for installing area carpet to achieve a professional-looking finish include careful preparation, precise measurements, and proper installation techniques.
- Preparation of the Subfloor: Before installing area carpet, it’s crucial to ensure that the subfloor is clean, dry, and level. Any debris or imperfections can affect the carpet’s appearance and longevity, so it’s advisable to sweep or vacuum the area thoroughly and fill in any holes or cracks.
- Measuring the Area: Accurate measurements are essential to ensure that the carpet fits perfectly in the designated space. Use a tape measure to calculate the length and width of the area and add a few extra inches for trimming, which will help achieve a snug fit against walls or furniture.
- Choosing the Right Padding: Selecting the appropriate carpet padding is vital for comfort and durability. The padding should be compatible with the type of carpet you are installing, providing cushioning and support while also enhancing the carpet’s lifespan.
- Cutting the Carpet: When cutting the carpet, use a sharp utility knife and a straight edge to ensure clean, precise edges. This will help prevent fraying and give a more polished look, allowing the carpet to fit seamlessly into the space.
- Securing the Carpet: Depending on the type of carpet and its intended use, securing it can involve using adhesive, double-sided tape, or carpet tacks. Properly securing the edges and seams helps to avoid curling or lifting, promoting a neat appearance.
- Seaming Techniques: For larger areas, seams may be necessary. Using correct seaming techniques, such as heat bonding or stitching, ensures that the seams are strong and less visible, contributing to a uniform look.
- Finishing Touches: After installation, trim any excess carpet and ensure that the edges are neat and tidy. Additionally, vacuuming the carpet can help remove any fibers and dust, providing a clean, professional finish.
How Can You Properly Maintain Your Area Carpet After Installation?
Proper maintenance is crucial for prolonging the life and appearance of your area carpet after installation.
- Regular Vacuuming: Frequent vacuuming is essential to remove dirt, dust, and debris that can accumulate on the carpet surface. It helps to maintain the carpet’s appearance and prevent dirt from embedding into the fibers, which can lead to wear over time.
- Spot Cleaning: Address spills and stains immediately using a suitable cleaning solution to prevent them from setting in. Blot the area gently with a clean cloth rather than scrubbing, as this can damage the fibers and spread the stain further.
- Professional Cleaning: Schedule professional deep cleaning every 12 to 18 months to maintain the carpet’s integrity and hygiene. Professionals have specialized equipment and cleaning agents that can effectively remove deep-seated dirt and allergens.
- Use Carpet Protectors: Applying a carpet protector can create a barrier against stains and spills, making it easier to clean and maintain the carpet. This treatment can also enhance the carpet’s durability, helping it to withstand foot traffic and wear.
- Rotate Furniture: Rearranging furniture occasionally can prevent uneven wear and help maintain the carpet’s shape. By moving heavy items, you can reduce the likelihood of indentation marks and ensure that all areas of the carpet receive equal exposure to foot traffic.
- Control Humidity and Temperature: Maintaining a stable indoor climate helps prevent mold growth and fiber damage. Use a dehumidifier or air conditioner to keep humidity levels in check, and avoid placing the carpet in areas with extreme temperature fluctuations.
- Avoid Direct Sunlight: Protect your area carpet from prolonged exposure to direct sunlight, which can cause fading and discoloration. Consider using curtains or UV-filtering window films to minimize sun damage.
What Common Mistakes Should You Avoid During Area Carpet Installation?
Common mistakes to avoid during area carpet installation include:
- Neglecting to Measure Accurately: Accurate measurements are crucial for a successful carpet installation. Failing to measure properly can lead to purchasing insufficient materials, which may result in seams or gaps that are difficult to fix.
- Ignoring Subfloor Preparation: A clean and level subfloor is essential for a proper carpet installation. Skipping this step can lead to uneven surfaces, which can affect the carpet’s appearance and longevity, causing it to wear unevenly over time.
- Not Using the Right Tools: Using incorrect or inadequate tools can complicate the installation process and result in a poor finish. It’s important to use specialized tools such as a carpet stretcher, seam roller, and utility knife to ensure a professional-looking installation.
- Overlooking Acclimation: Carpets need to acclimate to the room’s temperature and humidity before installation. Failing to allow for this acclimation can cause the carpet to shrink or expand after installation, leading to wrinkles and an unappealing look.
- Improper Seaming: Seaming is a critical aspect of carpet installation, and mistakes here can be very visible. Using the wrong method or not properly sealing seams can result in fraying and an unattractive finish that detracts from the overall aesthetic of the room.
- Ignoring Carpet Padding: Skipping or using inadequate carpet padding can affect both comfort and durability. The right padding provides cushioning, helps to prolong the carpet’s life, and improves insulation, making it an essential part of the installation process.
- Failing to Stretch the Carpet: Not stretching the carpet properly can lead to buckling and wrinkles after installation. A carpet stretcher is necessary to ensure the carpet is tight and flat, which not only enhances its appearance but also prevents future damage.
- Not Considering Traffic Patterns: It’s important to think about the room’s traffic flow when laying down carpet. Installing the carpet in a way that aligns with high-traffic areas can help mitigate wear and tear, ensuring the carpet lasts longer and maintains its appearance.